Low-Carb recipes? Oh, my goodness, where to begin!
Let me tell you – I have a treasure trove of delicious and healthy options that will make your taste buds dance with delight – Now I have to publish them.
I’ve got everything from refreshing salads loaded with fresh veggies and proteins to scrumptious soups bursting with savory flavors.
Whether you’re in the mood for a hearty breakfast packed with protein or a light snack that won’t weigh you down, my Low-Carb recipes are sure to please. Don’t get me started on the indulgent Keto desserts – yes, you can still satisfy your sweet tooth while staying true to your goals!
So buckle up because I’m about to take you on an exciting culinary journey filled with mouthwatering dishes that are guaranteed to keep both your taste buds and waistline happy and satisfied.
Are you ready? Let’s go! But always remember, if your calorie intake is higher than your spending… you won’t lose weight!
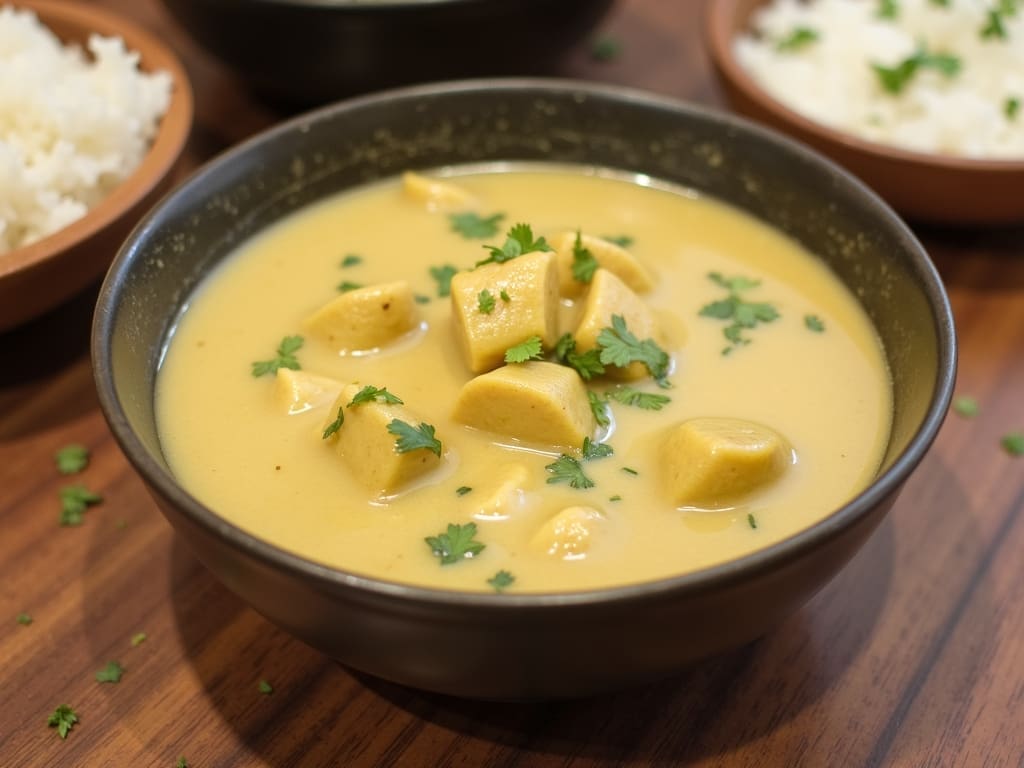
Terrific, easy-to-make curry with fish recipe with a modern twist while maintaining its authentic flavors!
🌊 Spiced Coconut Curry with fish
This recipe transforms white fish into an aromatic Asian-inspired dish featuring chili, ginger, and creamy coconut.
Preparation Time:
Marination: 30 minutes
Cooking: 35 minutes
Total: 65 minutes
Fish Selection Tip: Ask your fishmonger for fresh fish fillets cut sashimi-style. Always buy and consume your fish the same day, or at maximum, within the next day. Don’t store raw fish longer than that.
Marinate: Combine fish pieces with salt, turmeric powder & red chili powder. Mix thoroughly and refrigerate for 30 minutes.
Prepare Tamarind: Soak the tamarind pulp in a cup of warm water for 20 minutes.
Cook Base: Heat oil in a large saucepan over high heat. Add the mustard seeds, fenugreek, cloves and remaining whole spices until fragrant.
Make Gravy:
Add onions, remaining ginger and garlic
Fry until golden brown (about 10 minutes)
Strain tamarind liquid into a pan
Add coconut milk and cumin
Simmer for 15 minutes
Final Stage:
Gently add marinated fish
Simmer for 7 minutes until just cooked
Garnish with fresh cilantro
Serve hot with steamed Basmati rice.
Chef’s Tips: This dish celebrates classic Thai flavors – coconut cream, fish sauce, lime, and aromatics. It’s a punchy, clean and fragrant dish that’s surprisingly quick and easy to make.
This recipe creates a beautiful, aromatic Southeast Asian dish in which the white fish is perfectly complemented by the coconut broth and fresh herbs.
Remember, the key to this dish is using fresh ingredients and not overcooking the fish to maintain its tender texture!
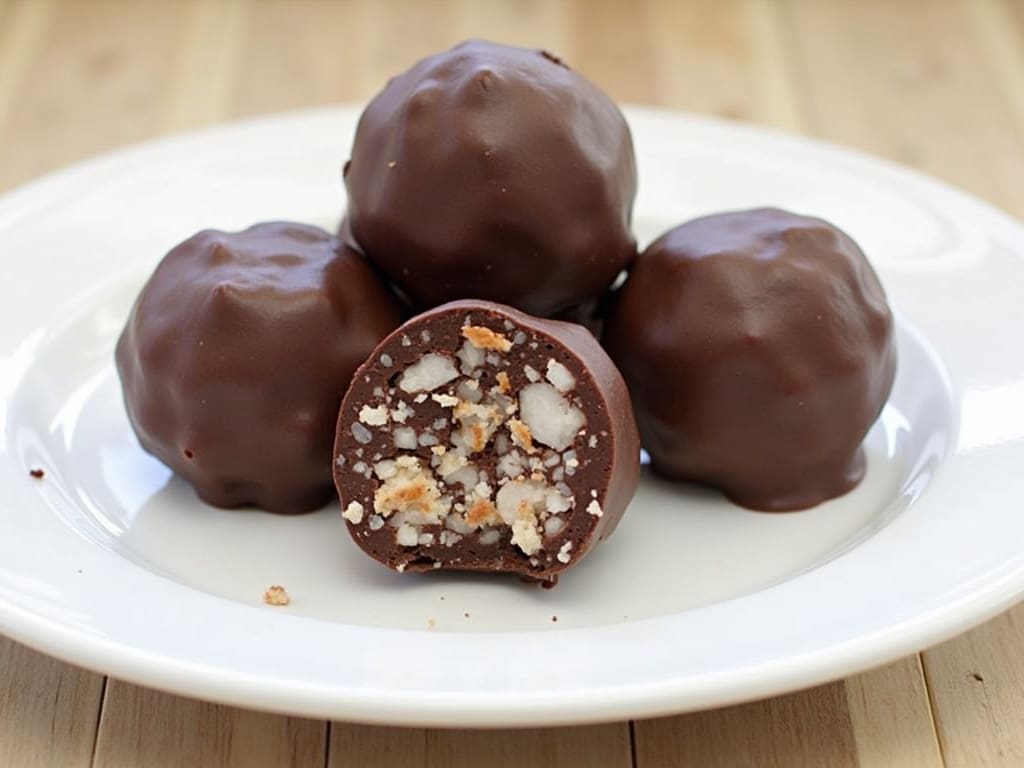
Are you craving a sweet treat that won’t disrupt your ketosis? Discover these Keto Chocolate Coconut Fat Bombs—a delightful, bite-sized snack that’s as nourishing as indulgent with only 1-2 g. of net carbs!
These fat bombs blend smooth almond butter, rich coconut oil, and deep cocoa flavor, creating a snack that satisfies your sweet tooth while keeping carbs low. With natural sweetness from a keto-friendly sweetener and a hint of vanilla, every bite is a burst of tropical, chocolatey bliss, perfect for an energy boost or a quick treat.
Fat Bombs Ingredients:
1/2 cup unsweetened shredded coconut
1/2 cup almond butter (or your favorite keto-friendly nut butter)
1/4 cup coconut oil, melted
2 tablespoons unsweetened cocoa powder (sifted for smooth mixing)
1 tablespoon keto-friendly sweetener (such as erythritol or monk fruit)
1/2 teaspoon vanilla extract
A pinch of salt
Instructions:
Mix the Base: In a medium bowl, whisk together almond butter, melted coconut oil, keto sweetener, vanilla extract, and salt until smooth.
Blend Flavors: Sift in the unsweetened cocoa powder and stir until the mixture is well combined and uniformly chocolatey.
Add Texture: Gently fold in the unsweetened shredded coconut to incorporate a pleasant crunch and added flavor.
Form the Bombs: Using a small cookie scoop or spoon, form the mixture into bite-sized balls and place them on a parchment-lined tray.
Chill: Refrigerate or freeze the fat bombs for at least 30 minutes until they firm up.
Serve: Enjoy straight from the fridge/freezer, or let them soften slightly for a melt-in-your-mouth experience.
Imagine indulging in a velvety, chocolate coconut treat that perfectly combines rich flavors with the goodness of healthy fats—each bite is a mini vacation for your taste buds yet completely keto-approved. Whether you need a midday energy boost or a guilt-free dessert, these fat bombs are designed to satisfy your cravings without compromise.
Don’t wait—grab your ingredients and whip up a batch of these Keto Chocolate Coconut Fat Bombs today. They’re easy to make, deliciously satisfying, and the perfect solution for a quick sweet fix on your keto journey. Enjoy!
These Keto Chocolate Coconut Fat Bombs are a sweet, low-carb snack that packs rich almond butter, coconut oil, and cocoa into every bite. With approximately 100 calories, 9 g of fat, and minimal net carbs per serving, they’re a perfect, guilt-free treat to keep you fueled and satisfied on your keto journey. Enjoy your homemade indulgence!
Questions that come back often:
What Are Fat Bombs?
Fat bombs are nutrient-packed, high-fat snacks designed primarily for people following a ketogenic diet. They help maintain ketosis by providing a concentrated source of healthy fats with minimal carbohydrates. Here’s a quick breakdown:
Versatility: You can customize fat bombs with a variety of ingredients like nut butters, coconut oil, cocoa, and even spices. They’re perfect for creating a sweet or savory snack that fits within your keto lifestyle.
Energy Boost: Fat bombs provide a quick source of energy by leveraging fats as the primary fuel, making them ideal for maintaining energy levels on a keto diet.
Satiety: Their high-fat content helps you feel full and satisfied between meals, curbing cravings and supporting weight loss or maintenance goals.
Ingredients Commonly Used in Fat Bombs
Fat bombs are designed to be high in healthy fats while keeping carbohydrates low. Typically, these are the ingredients you’ll find:
Healthy Fats:
Coconut oil: Provides a solid base and a pleasant tropical flavor.
Nut butter: Almond, peanut, or cashew butter adds creaminess and depth.
MCT oil: Often used for its quick energy benefits on keto diets.
Creamy Bases:
Cream cheese or full-fat dairy cream: Contributes richness and smooth texture.
Avocado: Sometimes blended in for its buttery consistency.
Flavor Enhancers:
Low-carb sweeteners: Erythritol, stevia, or monk fruit keep things sweet without the sugar spike.
Cocoa powder: For a decadent chocolatey twist.
Vanilla extract: Adds depth and rounds out flavors.
Optional Add-ins:
Nuts and seeds: Chopped pecans, walnuts, or chia seeds offer a crunch and a nutritional boost.
Spices: Cinnamon, nutmeg, or even a pinch of salt can elevate the flavors.
A Bold New Take on a Classic Favorite: Zucchini Fries
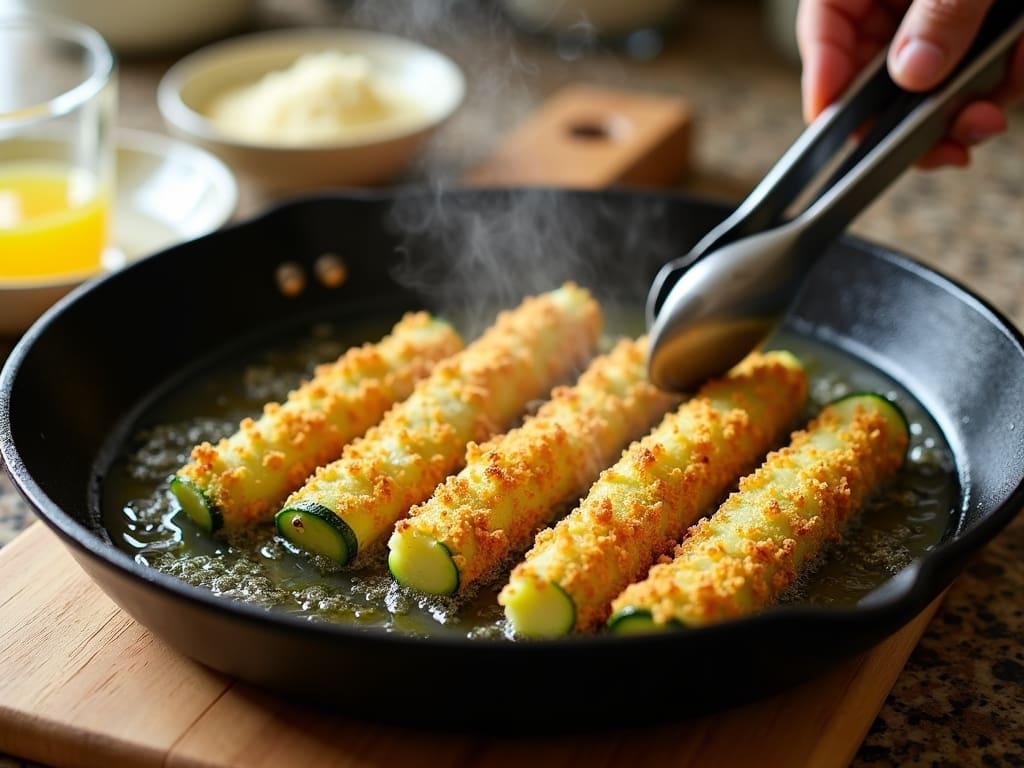
Ever wondered if you could swap out your traditional French fries with something that’s equally indulgent but packs a nutritional punch? Picture biting into crisp, savory fries that are bursting with flavor and surprisingly light on calories (5g of net carbs!).
Say goodbye to greasy, calorie-laden fries and welcome an innovative, heart-smart treat that fits perfectly into your lifestyle. With our Crispy Baked Zucchini Fries, you can embrace a dish that not only looks stunning on your plate but also delivers a crunch that rivals the original.
Discover the Features and Benefits
This isn’t just any ordinary recipe—it’s a fusion of taste, texture, and nutrition. Our Crispy Baked Zucchini Fries are designed to captivate both your palate and your health goals. Imagine enjoying a snack that’s rich in vitamins, low in calories, and bursting with flavor. Here are some of the key features:
Fresh Zucchini: The star of the dish, providing natural fiber and essential vitamins like A and C.
Lightly Baked: Using the oven means you get maximum crunch with minimal oil, reducing fat content significantly.
Delicious Seasoning: A blend of garlic powder, paprika, salt, and pepper elevates the taste to gourmet levels.
Nutritional Boost: With a calculated balance of protein from eggs and Parmesan, plus healthy fats from olive oil, this dish is as nutritious as it is delicious.
Imagine Your Life with Healthier Fries
Visualize a cozy evening spent with family or friends, where instead of the typical heavy french fries, you serve these golden, crispy zucchini fries. They’re perfect as a side dish or even a standalone snack, ready to tame those late-night cravings without the guilt. Enjoy them with your favorite dip—be it a homemade garlic aioli or a tangy tomato salsa—and experience the satisfaction of biting into something both light and indulgent.
These fries are not only a feast for the taste buds but also a win for your wellness. They deliver a compelling mix of juicy zucchini and a crispy, Parmesan-enhanced crust that makes each bite memorable. Plus, knowing you are nourishing your body with fewer calories while still enjoying a beloved snack adds a layer of satisfaction beyond taste. This recipe is perfect if you’re looking to impress guests at a dinner party, add a twist to your family meals, or simply treat yourself to a better version of your favorite comfort food.
Let’s Get Cooking Zucchini Fries!
Gather your ingredients—once you’re ready, follow our detailed step-by-step instructions to create this culinary masterpiece in your own kitchen. Roll up your sleeves, preheat your oven, and let’s transform humble zucchini into an irresistible delight!
Ingredients and Quantities
Zucchini: 4 medium-sized zucchinis (approximately 1.5 to 2 pounds total)
Eggs: 2 large eggs (whisked)
Breadcrumbs: 1 cup plain panko breadcrumbs (for extra crunch)
Parmesan Cheese: ½ cup finely grated Parmesan cheese
Olive Oil: 2 tablespoons extra virgin olive oil
Garlic Powder: 1 teaspoon
Paprika: ½ teaspoon smoked paprika for a tangy kick
Salt: 1 teaspoon (or to taste)
Black Pepper: ½ teaspoon freshly ground
Optional Herbs: 1 tablespoon finely chopped fresh parsley for garnish
Zucchini Fries Nutritional Facts (Approx. per serving, assuming 4 servings)
Calories: ~180 per serving
Total Fat: ~7 grams (of which saturated fat ~2 grams)
Preheat your oven to 425°F (220°C). Line two baking sheets with parchment paper to ensure the fries do not stick and for easy cleanup.
Wash the zucchinis thoroughly. Trim the ends off and cut each zucchini into evenly sized sticks, resembling the classic french fry shape. Aim for a thickness of about ¼ to ½ inch for each stick as this ensures they bake evenly.
Setting Up the Coating Stations:
In a medium bowl, whisk the 2 large eggs until smooth.
In another shallow bowl, combine the 1 cup of panko breadcrumbs with ½ cup grated Parmesan cheese. Add the garlic powder, smoked paprika, salt, and black pepper into this mixture. Stir well to distribute the spices evenly.
Pour the extra virgin olive oil into a small dish for an easy brush-on later during the process.
Coating the Zucchini Sticks:
Dip each zucchini stick into the beaten eggs, ensuring it’s well coated. Allow any excess egg to drip off.
Roll the egg-covered zucchini stick in the breadcrumb mixture, making sure it is completely covered for that extra crunch. For an extra thick crust, you can double-dip by re-dipping the coated zucchini in egg and then giving it another roll in the breadcrumb mixture.
Arrange the coated sticks on the prepared baking sheets in a single layer without overlapping. This step is crucial for achieving an even, crispy texture.
Baking Process:
Once all sticks are prepared, drizzle a little olive oil over them using a brush. This helps in forming a golden, crisp coating.
Place the baking sheets in the preheated oven. Bake for 25-30 minutes, flipping the zucchini fries halfway through to ensure both sides are evenly cooked and crispy.
Keep an eye on them during the final minutes: the fries should be light golden and crunch to the bite, without being overly dry or undercooked in the center.
Final Touch and Serving:
Once baked to perfection, remove the zucchini fries from the oven. Optionally, sprinkle some freshly chopped parsley on top for an extra burst of flavor and color.
Serve immediately for the best texture. Enjoy them as a healthy snack, a side to a main course, or even as an appetizer with your favorite dipping sauce.
Additional Tips and Variations
For a Spicier Kick: Add a pinch of cayenne pepper to the breadcrumb seasoning. This gives the fries a subtle heat that complements the natural flavor of zucchini.
Gluten-Free Version: Use gluten-free breadcrumbs instead of traditional panko to cater to those with gluten sensitivities.
Cheese Variations: Experiment with different types of cheese. Try mixing in a bit of smoked Gouda or Asiago for a unique flavor twist.
Alternative Dips: Though these fries are delicious on their own, consider preparing a yogurt-based dip or a zesty marinara sauce. Alternatively, a tangy garlic aioli pairs superbly with these crispy delights.
Extra Crispy Option: If you desire an even crispier texture, after baking, crisp up the fries in a preheated broiler for an additional 2-3 minutes. Watch carefully to avoid burning.
Meal Addition: These fries can also be a creative side for salads, lean protein dishes, or even as part of a vegetarian meal spread, proving their versatility in any dining situation.
The Health and Flavor Impact
When compared to traditional french fries, these zucchini fries offer a nutritious alternative with a fraction of the calories and fat content. Zucchini is naturally high in water, vitamins, and antioxidants, making it a superior choice for anyone monitoring their dietary intake. Baking instead of deep-frying significantly reduces unwanted fats while preserving the satisfying crunch.
Imagine indulging in your favorite comfort food while making a health-conscious choice—all without compromising on taste or texture. Not only are you enhancing your diet, but you’re also exploring a variety of creative ways to reinvent familiar dishes. This recipe encourages you to interact with food on a more imaginative level, proving that even a simple fry can be transformed into a culinary delight.
Wrapping Up Your Culinary Journey
With these detailed instructions and tips, you’ve got all you need to create an outstanding dish that redefines what fries can be. Whether you are cooking for yourself, impressing guests, or looking to make a healthier lifestyle choice, this recipe caters to all these needs and more.
So what are you waiting for? Gather your ingredients, fire up the oven, and experience the delightful crunch of our Crispy Baked Zucchini Fries. This recipe not only provides a sensory delight but also champions a nutritious and satisfying alternative to your traditional French fry cravings. Happy cooking and enjoy every bite!
By following this recipe, you make a conscious choice for a healthier lifestyle without sacrificing flavor or satisfaction. Enjoy the process, experiment with the variations, and let these zucchini fries remind you that delicious, nutritious food can truly be fun and exciting!
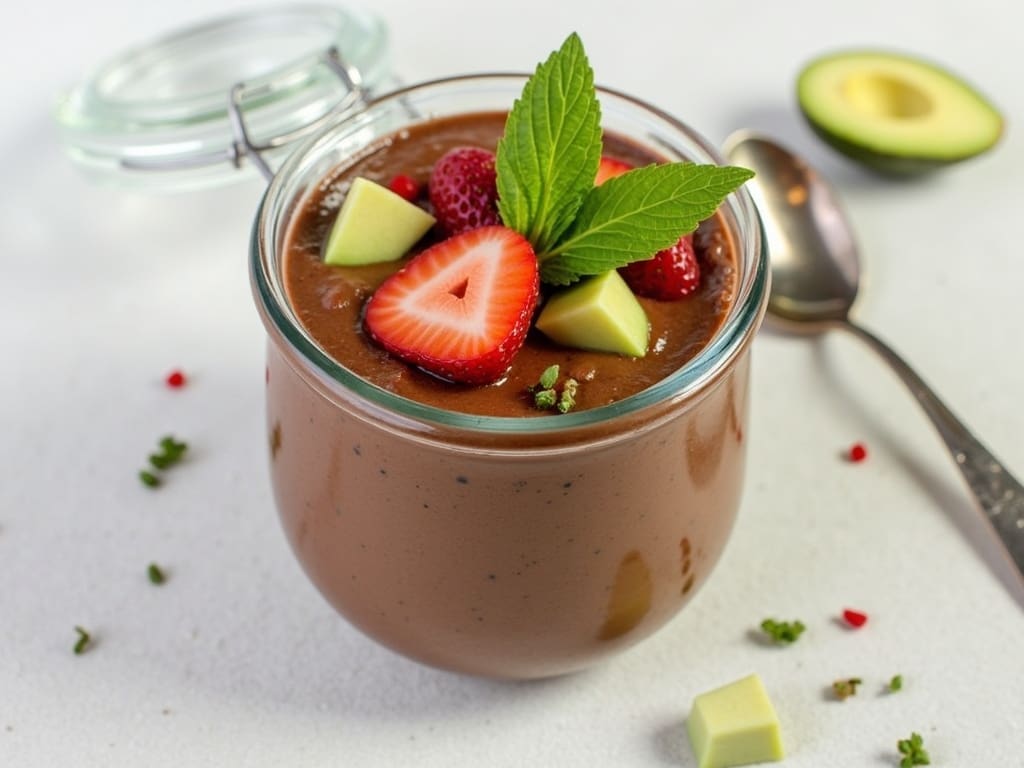
Many asked for a decadent dessert that’s both keto-friendly and irresistibly rich. Try my Keto Chocolate Avocado Mousse—a luscious, creamy treat that delivers a chocolate fix without derailing your low-carb lifestyle with only 5 net carbs!
This dessert blends ripe avocados with unsweetened cocoa, a keto-approved sweetener, and full-fat coconut milk to create a silk-smooth mousse. The natural creaminess of avocado paired with the deep cocoa flavor makes each spoonful both satisfying and guilt-free. Plus, it’s quick to whip up, making it the perfect dessert for weeknight indulgence or an impressive finish for dinner parties.
Optional: A dab of unsweetened whipped cream and a few raspberries or mint leaves for garnish
Instructions:
Blend the Base: Place the avocado flesh in a food processor and blend until completely smooth.
Mix Flavors: Add the unsweetened cocoa powder, keto sweetener, coconut milk, vanilla extract, and a pinch of salt to the puree. Blend again until the mixture is creamy and thoroughly combined.
Taste and Adjust: Give the mousse a quick taste; adjust sweetness or cocoa intensity if needed.
Chill: Spoon the mousse into serving bowls and refrigerate for at least 1 hour to let the flavors meld and the texture firm up.
Garnish and Serve: Before serving, add a dollop of whipped cream and garnish with fresh raspberries or mint leaves if desired.
Imagine savoring each bite of this velvety keto chocolate mousse, where the richness of chocolate meets the subtle, buttery flavor of avocado. Its smooth, satisfying texture and balanced sweetness will make dessert time the highlight of your day. Even on a strict keto regimen, you get to enjoy the luxury of dessert without compromise. Healthily indulge your sweet tooth by trying this Keto Chocolate Avocado Mousse today! Whip up a batch, impress your friends, and treat yourself to a dessert that’s as nourishing as it is decadent.
Nutritional Facts (Estimated per Serving—Recipe yields 4 servings):
Nutrient
Amount per Serving
Calories
~300 kcal
Total Fat
~24 g
• Saturated Fat
~5 g
Total Carbohydrates
~12 g
• Dietary Fiber
~7 g
• Net Carbs
~5 g
Protein
~3 g
Indulge in the rich and creamy goodness of this luscious Keto Chocolate Avocado Mousse, a decadent dessert that is sure to satisfy your sweet tooth while staying true to your low-carb lifestyle. Made with wholesome ingredients like avocados and cocoa powder, this dessert is not only delicious but also packed with nutrients, healthy fats, and antioxidants.
Avocados are a great source of monounsaturated fats, fiber, vitamins, and minerals, making them a perfect addition to any diet. In this recipe, the avocados provide a velvety smooth texture to the mousse, adding a luxurious feel to each bite. The cocoa powder brings in a rich chocolate flavor that will leave you craving more.
With only 300 calories per serving and low net carbs, this Chocolate Avocado Mousse is an ideal guilt-free treat for anyone looking to enjoy a sweet dessert without straying from their low-carb goals. Whether you are following a ketogenic diet or simply trying to reduce your sugar intake, this recipe is a delicious way to satisfy your cravings while staying on track.
This dessert is straightforward to make, requiring just a few basic ingredients and minimal effort. Simply blend together ripe avocados, cocoa powder, sweetener of choice, vanilla extract, and a pinch of salt until smooth and creamy. Chill in the refrigerator for a few hours to allow the flavors to meld together, then top with your favorite toppings such as whipped cream, nuts, or berries before serving.
So, treat yourself to a bowl of this heavenly Chocolate Avocado Mousse and savor every spoonful of this delightful symphony of flavors. It’s the perfect way to end a meal or indulge in a nourishing and delicious dessert without any guilt. Enjoy the decadence of chocolate without compromising your health goals with this delectable Keto Chocolate Avocado Mousse.
Enjoy this delicious, low-carb bread, perfect for sandwiches or as a side to any meal. It has 2g of net carbs per slice. Crafted with almond flour and a boost of psyllium husk powder for structure, this recipe gives you a loaf with a hearty texture and delightful nutty flavor—all while keeping your net carb count in check.
Below is a detailed recipe, complete with nutritional facts and exact quantities, to guide you every step of the way.
Sesame or Poppy Seeds: 1-2 tablespoons (for topping)
Step-by-Step Instructions
1. Preheat and Prepare
Preheat Oven:
Set your oven to 350°F (175°C).
Prepare the Pan:
Grease a standard 8.5″ × 4.5″ loaf pan with olive oil or line it with parchment paper for easy removal.
2. Mix the Dry Ingredients
Combine Ingredients:
In a large bowl, whisk together 2 cups almond flour, 3 tablespoons psyllium husk powder, 1 teaspoon baking powder, and ½ teaspoon salt.
Optional Flavor Boost:
If using herbs, stir them into the dry mix for a fragrant twist.
3. Blend the Wet Ingredients
Beat the Eggs:
In a separate bowl, lightly beat 4 large eggs until frothy.
Incorporate Fats:
Mix in 2 tablespoons of olive oil (or melted butter) until fully combined.
Add Boiling Water:
Carefully stir in 1 cucup ofoiling water. The hot water helps “activate” the psyllium husk, giving the dough a better structure and improved elasticity.
4. Combine and Rest the Dough
Mix Together:
Pour the wet ingredients into the dry ingredients. Stir with a spatula or wooden spoon until a thick, uniform dough forms.
Let It Rest:
Allow the dough to sit for 5 minutes. This resting period lets the psyllium husk absorb the water and expand, which is key to achieving a cohesive, sliceable loaf.
5. Shape, Bake, and Cool
Transfer to Pan:
Spoon the dough into your prepared loaf pan, using a spatula to smooth and level the top.
Optional Topping:
Sprinkle sesame or poppy seeds over the top for a pleasant crunch and extra flavor.
Bake:
Place the pan in your preheated oven and bake for 50–60 minutes. The bread is done when the top is firm and a toothpick inserted into the center comes out clean.
Cool Down:
Remove from the oven and let the bread cool in the pan for 10 minutes before transferring to a wire rack. Cooling the bread prevents it from becoming gummy and ensures perfect slicing.
Nutrition Facts for this Low-Carb Bread Recipe (Per Slice)
Based on a loaf divided into 10 equal slices. Values are approximate and may vary with ingredient brands.
Nutrient
Amount per Slice
Calories
180 kcal
Total Fat
15 g
Saturated Fat
3 g
Cholesterol
60 mg
Total Carbohydrates
8 g
Dietary Fiber
6 g
Net Carbohydrates
2 g
Protein
7 g
Note: These nutritional estimates for this low-carb bread recipe account for the natural variations found in almond flour and eggs. Adjustments such as using butter instead of olive oil or adding seeds may slightly change the nutritional profile.
Tips and Variations of this Low-Carb Bread Recipe
Extra Moisture: If you prefer a slightly moister bread, try adding an extra egg or a splash of unsweetened almond milk.
Texture Adjustment: For a lighter texture, sift the almond flour before mixing; this can help prevent a dense final product.
Flavor Enhancements: Mix in a teaspoon of dried herbs or a pinch of garlic powder for a savory twist, or add a tablespoon of sweetener (like erythritol) and cinnamon for a subtly sweet variant.
Storage: Store the cooled bread in an airtight container in the refrigerator for up to 5 days. It also freezes well; simply slice and toast as needed.
Final Thoughts
This low-carb bread recipe is an ideal solution for anyone looking to enjoy a slice of freshly baked bread without the guilt of high-carb ingredients. With a blend of almond flour and psyllium husk powder, it provides a sturdy structure and an appealing nutty flavor—all while keeping net carbs extremely low. The integration of boiling water helps activate and thicken the dough, ensuring every slice comes out perfectly.
Whether you’re using it for keto sandwiches or as a side at mealtime, this bread is a versatile addition to any low-carb diet. The comprehensive nutritional breakdown helps you track your macros while allowing you to indulge in a delicious, homemade treat.
Summary
Ingredients: Precise measurements include almond flour, psyllium husk powder, eggs, and boiling water—all contributing to a low-carb, protein-rich loaf.
Preparation: Detailed instructions guide you from mixing to resting, shaping, and baking for a perfect rise and texture.
Nutrition: Each slice (from a 10-slice loaf) contains roughly 180 kcal, 15 g fat, 8 g carbs (with 6 g fiber), and 7 g protein, making it a smart choice for low-carb living.
Enjoy this wholesome and satisfying low-carb bread recipe and let it become a staple in your healthy eating repertoire
Ready to treat your taste buds to a luxurious seafood delight? This Crab Salad in Avocado Boats recipe transforms ordinary ingredients into an eye-catching, flavor-packed dish—perfect for impressing guests or treating yourself to a gourmet lunch!
Ingredients
1/3 cup finely chopped red onion
3 tablespoons mayonnaise
1/2 teaspoon Thai-style hot sauce (e.g., Sriracha)
2 tablespoons chopped fresh cilantro
3 teaspoons fresh lime juice (2 tsp for the salad, 1 tsp for the avocado)
1/2 teaspoon ground cumin
1/2 teaspoon lime zest
8 ounces of lump crab meat
1 ripe large avocado, halved and pitted
Salt and pepper, to taste
Lime wedges for serving
Crab SaladInstructions
Mix the Magic: In a medium bowl, stir together the red onion, mayonnaise, hot sauce, cilantro, 2 teaspoons of lime juice, cumin, and lime zest until well combined.
Fold in the Seafood: Gently blend in the crab meat and season with salt and pepper to suit your taste.
Avocado Prep: Lightly brush each half of the avocado with the remaining 1 teaspoon of lime juice. This not only adds brightness but also keeps the avocado beautifully vibrant.
Assemble and Serve: Spoon the luxurious crab salad generously onto each avocado half. Finish with a side of lime wedges and get ready to enjoy a dish that is as delightful to look at as it is to savor!
Crab Salad Nutritional Facts (Estimated per Serving—Recipe yields 2 servings)
Nutrient
Amount per Serving
Calories
~410 kcal
Protein
~22 g
Total Fat
~29.5 g
• Saturated
~5–7 g
Carbohydrates
~10 g
• Dietary Fiber
~6.5 g
Sugars
~2 g
Notes on Calculation:
Mayonnaise: Assumed at ~90 calories per tablespoon (total ~270 calories).
Crab Meat: Estimated at ~200 calories for 8 ounces with a protein boost of about 40 g (split evenly between servings).
Avocado: A large avocado is roughly 322 calories and is rich in healthy fats and fiber.
Additional ingredients such as red onion, hot sauce, lime juice, cilantro, and spices contribute minimally to the overall calorie count.
Don’t wait! Grab your ingredients and prepare this gourmet creation today. Your plate—and your taste buds—are in for a treat. Happy cooking!
Summary: This recipe transforms simple ingredients into an elegant crab salad served in avocado halves. With its fresh, zesty flavors and nutrient-rich profile (about 410 calories per serving, 22 g protein, and 29.5 g fat), it’s perfect for a quick gourmet meal. Enjoy the culinary adventure and impress both friends and family!
Are you ready to light up your grill and transform your dinner routine into a gourmet feast? This Cedar-Planked Salmon with Mustard Dill Sauce delivers smoky, zesty elegance in every bite—perfect for impressing friends and savoring a restaurant-quality meal at home.
Our recipe features succulent salmon fillets enhanced by a vibrant blend of olive oil, lemon zest, and Dijon mustard. The cedar plank infuses a subtle smokiness that harmonizes with the tangy, herb-infused mustard dill sauce, boasting fresh chives, dill, and a juicy squeeze of lemon. Every element is selected to enhance flavor while keeping the dish simple, light, and irresistibly tasty.
Ingredients:
For the Salmon:
4 salmon fillets (about 1 lb total)
2 tablespoons olive oil
1 teaspoon grated lemon rind
2 tablespoons fresh lemon juice
1 tablespoon chopped fresh chives (or green onion)
Two 12″ x 7″ untreated cedar planks (soaked in water for at least 30 minutes to 24 hours)
Cedar-Planked Salmon Instructions:
Prep the Planks & Salmon: Soak the cedar planks thoroughly. Once ready, place your salmon fillets on top. In a small bowl, whisk together olive oil, lemon rind, lemon juice, chives, Dijon mustard, salt, and pepper.
Season the Salmon: Brush the salmon generously with the lemon-mustard mixture to infuse every bite with zest.
Grill to Perfection: Place the planks on your grill over medium-high heat. Close the lid and cook for about 20 minutes, basting with extra lemon mixture halfway through, or until the salmon flakes easily with a fork.
Create the Dill Sauce: While the salmon grills combine the sour cream, chopped cucumber, dill, chives, salt, and pepper in a small bowl.
Serve: Arrange the cedar planks on a platter and drizzle or serve alongside the mustard dill sauce for a delightful dipping experience.
Imagine cutting into a perfectly grilled cedar-planked salmon fillet, its natural flavors elevated by a hint of cedar and a burst of citrusy-mustard glaze. The creamy dill sauce balances the smokiness with a refreshing tang, making every bite a celebration of flavors. This dish isn’t just a meal—it’s a culinary adventure that brings sophistication and mouthwatering delight right to your dinner table.
Fire up your grill and get those cedar planks soaking because you are in for a culinary treat that will tantalize your taste buds and impress your dinner guests. Cedar plank grilling is a method that infuses your food with a rich, smoky flavor that can’t be replicated by any other cooking technique. The cedar planks themselves impart a unique aroma to the food, enhancing the overall dining experience.
Nutritional Facts (Estimated per Serving – Recipe yields 4 servings):
Nutrient
Amount per Serving
Calories
~404 kcal
Protein
~26 g
Total Fat
~31 g
• Saturated Fat
~6-8 g
Carbohydrates
~2 g
• Sugars
~1 g
Calculations are based on approximate values:
Salmon Fillets: Each 4‑oz fillet provides around 233 calories, 25 g protein, and 13 g fat.
Olive Oil: 2 tablespoons add roughly 240 calories and 28 g fat (divided equally among servings).
Sour Cream: 1 cup of full‑fat sour cream contributes about 445 calories and around 44 g fat (divided among 4 servings).
Summary: This Cedar-Planked Salmon with Mustard Dill Sauce is a show-stopping dish featuring smoky, perfectly grilled salmon enhanced with a zesty, herbaceous marinade and a cooling, creamy sauce. With approximately 404 calories, 26 g protein, and a deliciously balanced fat content per serving, it delivers gourmet flavors in every bite. Get grilling and let your dinner shine!
This dish transforms humble zucchini into a hearty keto zucchini pasta alternative that embraces the Keto diet’s low-carb, high-fat philosophy while still delivering a satisfying and flavorful meal with only 7g of carbs.
By combining fresh, spiralized zucchini with a rich, creamy pesto sauce, you get a dish that’s both visually delightful and mouthwateringly indulgent. Below, you’ll find every detail from quantities to nutrition facts, ensuring that you can confidently recreate this recipe in your kitchen.
Olive Oil: 1 tablespoon (for sautéing, optional for extra flavor)
For the Creamy Pesto Sauce:
Basil Leaves: 1 cup (packed)
Pine Nuts: 1/3 cup (approximately 50 g)
Garlic: 2 cloves, minced
Extra Virgin Olive Oil: 1/4 cup (4 tablespoons)
Heavy Cream: 1/2 cup (120 mL; use full-fat cream for extra richness)
Grated Parmesan Cheese: 1/4 cup (about 25 g)
Lemon Juice: 1 tablespoon (freshly squeezed for brightness)
Salt and Freshly Ground Black Pepper: To taste
Optional Garnishes:
Cherry Tomatoes: 1/2 cup, halved
Extra Parmesan Cheese: A sprinkle on top
Fresh Basil Leaves: A few for decorative flair
Step-by-Step Instructions
1. Prepare the Keto Zucchini Pasta
Spiralize the Zucchinis:
Using a spiralizer, turn your 4 medium zucchinis into noodles. You can also use a julienne peeler if you don’t have a spiralizer.
Salt and Drain:
Place the zucchini noodles in a colander, sprinkle with 1 teaspoon of salt, and let them sit for about 15 minutes.
This step helps draw out excess water, ensuring your pasta stays firm and not too watery.
Pat Dry:
Use paper towels to gently squeeze and pat down the zucchini noodles, removing as much moisture as possible.
2. Make the Creamy Pesto Sauce
Blend the Base:
In a food processor or high-speed blender, add 1 cup of basil leaves, 1/3 cup of pine nuts, and 2 cloves of minced garlic. Pulse until roughly chopped.
Add Olive Oil:
With the processor running, slowly drizzle in the 1/4 cup extra virgin olive oil until the mixture becomes a coarse paste.
Emulsify the Cream:
Transfer the basil mixture to a small saucepan over low heat. Stir in the 1/2 cup heavy cream and let it warm for about 2 minutes.
Add 1/4 cup grated Parmesan cheese and 1 tablespoon of lemon juice. Stir until the sauce is smooth and creamy.
Season:
Taste the sauce and season with salt and freshly ground black pepper to your preference.
Remove from heat once it reaches your desired consistency.
3. Combine Keto Zucchini Pasta and Sauce
Warm the Keto Zucchini Pasta:
Optionally, in a large skillet, add 1 tablespoon of olive oil over medium heat. Quickly sauté the zucchini noodles for 2-3 minutes just to warm them up (avoid overcooking to preserve their crunch).
Mix Together:
Pour the warm creamy pesto sauce over the zucchini noodles and gently toss until well incorporated.
Garnish and Serve:
If desired, sprinkle with cherry tomatoes, an extra pinch of Parmesan, and fresh basil leaves before serving.
4. Presentation Tips
Plate Effectively: Serve this dish in shallow bowls to highlight the colorful zucchini noodles and vibrant green sauce.
Add Texture: Consider adding toasted pine nuts or even a few slices of avocado on top for an extra dose of healthy fats.
Serve Warm: This recipe is best served immediately while the sauce is warm and the zucchini noodles maintain their bite.
Nutrition Facts (Per Serving)
(Based on 2 servings; estimated values)
Nutrient
Amount per Serving
Calories
~690 kcal
Total Fat
~62 g
Saturated Fat
~25 g
Cholesterol
~150 mg
Sodium
~350 mg
Total Carbohydrates
~10 g
Dietary Fiber
~3 g
Net Carbs
~7 g
Protein
~13 g
Note: These nutrition facts are approximate and will vary based on specific brands and ingredient sizes used. Adjustments in ingredients such as switching heavy cream for coconut cream or altering the amount of Parmesan can modify these values.
Detailed Explanation and Tips
The Role of Each Ingredient
Zucchini: Zucchini serves as an ideal low-carb pasta substitute due to its high water content and minimal net carbs, fitting perfectly within the keto framework. Its neutral flavor allows the creamy pesto sauce to shine, and spiralizing creates an appealing, pasta-like texture.
Basil & Pine Nuts: The combination of basil and pine nuts is a traditional pesto base that offers a rich, aromatic flavor profile. Pine nuts add a delightful crunch and healthy fats, which are crucial on the keto diet.
Garlic: Garlic infuses the dish with a robust flavor, supporting the overall taste profile without adding significant carbs.
Olive Oil & Heavy Cream: These fats are key to achieving a creamy, luxurious sauce. Olive oil is rich in monounsaturated fats that promote heart health, while heavy cream boosts the dish’s richness and satiating quality.
Parmesan Cheese: Parmesan adds a salty, tangy depth to the sauce while providing protein and essential nutrients. It also helps thicken the sauce, making it cling to the zucchini noodles.
Cooking Techniques for Best Results
Avoid Sogginess: Salting and drying the keto zucchini pasta is critical. This step prevents your dish from becoming watery, ensuring that every bite has a consistent texture.
Gentle Heat for the Sauce: When creating the creamy sauce, keep the heat low to avoid curdling the cream or burning the garlic. The gentle warming process allows the flavors to meld perfectly.
Quick Sauté: If you choose to warm the zucchini noodles in a skillet, do so only briefly. Overcooking can lead to a mushy texture, detracting from the dish’s appeal.
Layering Flavors: Incorporate ingredients at different stages (raw basil and lightly warmed cream) to provide contrasting textures and fresh bursts of flavor throughout the dish.
Enhancements & Variations
Alternative Proteins: For added protein, consider mixing in grilled chicken, shrimp, or even a few crumbled hard-boiled eggs. This can transform the dish from a side to a satisfying main course.
Vegan or Dairy-Free Options: Replace heavy cream with full-fat coconut cream and Parmesan with nutritional yeast to keep the dish vegan while maintaining the creamy texture.
Extra Vegetables: Enhance the color and nutritional profile by adding low-carb vegetables like spinach or arugula. Toss these in at the very end to preserve their fresh flavors and textures.
Spice It Up: For those who enjoy a kick, add a pinch of red pepper flakes into the pesto sauce during blending. This adds a subtle heat without overpowering the basil’s freshness.
Time Management and Serving Suggestions
Prep Time: The entire prep process (spiralizing, salting, and draining zucchini) takes about 20 minutes.
Cooking Time: The sauce requires about 10 minutes of attention, while warming the zucchini can be done concurrently in 2-3 minutes.
Total Time: Expect to invest roughly 30-35 minutes from start to finish.
Meal Pairing: Serve with a light, crisp salad (e.g., mixed greens with lemon vinaigrette) to balance the richness of the pasta. A glass of dry white wine or sparkling water with lemon can also complement the meal beautifully.
Final Thoughts
This Keto Zucchini Pasta with Creamy Pesto Sauce is more than just another recipe—it’s a celebration of flavors that respect the principles of Keto while ensuring every bite is bursting with nutrients and taste. The dish embraces the uniqueness of each ingredient: the spiralized zucchini acts as a versatile canvas, the basil and pine nuts deliver punchy, herbaceous notes, and the creamy sauce ties everything together in a decadent, yet health-conscious manner.
By following these detailed instructions and tips, you’ll create a restaurant-quality meal in your own kitchen. The thoughtfully listed nutrition facts help you keep track of your macros without sacrificing flavor or satisfaction. Whether you’re a long-time Keto enthusiast or just dipping your toes into low-carb living, this dish is the perfect blend of indulgence and nourishment.
Remember, small tweaks and experimentations can further personalize this recipe to your taste preferences—feel free to adjust flavors, ingredients, or textures based on what makes your Keto journey both enjoyable and sustainable.
This Keto Italian Casserole is a cheesy, low-carb comfort dish that’ll make your taste buds do the cha-cha! Makes 6 hearty servings with only 4.5g of net carbs!
Macros Per Serving:
Calories: 450
Net Carbs: 4.5g
Protein: 32g
Fat: 34g
Fiber: 2.5g
Keto Italian Casserole Ingredients:
16 oz (454g) ground pork (80/20 fat ratio)
5.3 oz (150g) zucchini, diced (⅜-inch cubes)
4.4 oz (125g) mixed bell peppers (⅜-inch dice)
4 oz (113g) cremini mushrooms, ¼-inch slices
3 oz (85g) fresh spinach, roughly chopped
8 oz (227g) full-fat ricotta cheese
8 oz (227g) whole milk mozzarella, shredded
2 oz (56g) parmesan cheese, finely grated
2 large garlic cloves (10g), minced
1½ tbsp (22ml) extra virgin olive oil
1½ tsp Italian seasoning blend
1¼ tsp kosher salt
½ tsp fresh ground black pepper
8-10 fresh basil leaves for garnish
Cooking Instructions:
Preheat the Oven: Preheat your oven to 375°F (190°C).
Cook the Pork: In a large skillet over medium heat, add olive oil. Once hot, add the ground pork and cook until browned, about 5-7 minutes. Break it into small pieces as it cooks.
Add Veggies: Stir in the minced garlic, zucchini, bell peppers, and mushrooms. Sauté for about 5-6 minutes until the veggies are tender.
Incorporate Spinach: Add the chopped spinach and cook for an additional 2 minutes, just until wilted. Season with Italian seasoning, salt, and pepper.
Mix Cheeses: In a separate bowl, mix the ricotta cheese with half of the mozzarella and half of the parmesan. Stir until well combined.
Combine Mixtures: In a large casserole dish, layer the pork and vegetable mixture followed by the cheese mixture. Spread it evenly and top with the remaining mozzarella and parmesan cheeses.
Bake: Bake in the preheated oven for 25-30 minutes, until the cheese is bubbly and golden.
Garnish and Serve: Remove from the oven, let it cool for a few minutes, and garnish with fresh basil if desired. Serve warm.
Nutritional Breakdown (per serving):
Ingredient
Calories
Protein
Fat
Net Carbs
Ground Pork
180
16g
14g
0g
Cheeses
195
13g
15g
2g
Vegetables
55
3g
3g
2.5g
Olive Oil
20
0g
2g
0g
Pro Tips:
For extra flavor, Brown the pork until you get some crispy bits
Make ahead: Assemble up to 24 hours in advance
Storage: Keeps for 4 days in fridge, 3 months in freezer
This is a different version when I use keto lasagna 🙂
Fun Fact: This recipe packs more protein than a medium steak and fewer carbs than half an apple!
This Keto Italian Casserole is perfect for satisfying your cravings while maintaining your low-carb diet. Serve it up for dinner and watch it become a family favorite. The cheesy goodness combined with the savory Italian flavors creates a mouthwatering experience. Each serving is packed with protein and flavor, making it a nutritious and delicious choice. Try this Keto Italian Casserole today and indulge guilt-free in every bite.
Now that’s what I call a win-win situation! 🏆 Remember: Let it rest for 10 minutes after baking – it’s like giving your casserole a tiny spa moment before diving in! 😉
Indulge in the rich, cheesy layers of this Keto Italian Casserole for a satisfying low-carb meal. Don’t forget to let it rest for 10 minutes after baking to enhance the flavors. This dish offers a protein-packed and flavorful alternative to traditional casseroles. With fewer carbs than half an apple, it’s a guilt-free choice for dinner. Treat your taste buds to the savory goodness of this family favorite recipe.
Zucchini Health Benefits:
Zucchini is low in calories but high in vitamins, minerals, antioxidants, and fiber. Eating zucchini can help with digestion, support eye and heart health, strengthen your immune system, and may even aid in weight loss. It’s a versatile veggie you can enjoy raw, cooked, in salads, soups, or as a low-carb substitute for noodles!
This recipe with almond flour pasta offers a creative twist on traditional pasta. It uses almond flour as the base for a low-carb, gluten-free alternative that perfectly fits your Keto lifestyle with only 1g of net carbs per serving!.
The dough is enriched with eggs and a touch of olive oil for moisture and flavor, while psyllium husk powder helps to provide structure and elasticity. Enjoy your homemade pasta with your favorite Keto-friendly sauce or a drizzle of extra virgin olive oil and a sprinkle of Parmesan.
Almond Flour Pasta Ingredients
Pasta Dough
Almond Flour: 1 cup (approximately 96 g)
Psyllium Husk Powder: 2 tablespoons
Salt: ½ teaspoon
Eggs: 2 large
Olive Oil: 1 tablespoon
For Cooking the Pasta:
Water: 4-6 cups (for boiling)
Additional Salt: 1 teaspoon (for the boiling water)
Step-by-Step Instructions
1. Prepare the Dough
Mix Dry Ingredients: In a medium bowl, whisk together 1 cup almond flour, 2 tablespoons psyllium husk powder, and ½ teaspoon salt until well combined.
Combine Wet Ingredients: In a separate bowl, beat 2 large eggs with 1 tablespoon olive oil until the mixture is smooth.
Form the Dough: Pour the egg mixture into the dry ingredients. Mix thoroughly using a fork or your hands until a cohesive dough forms. If the dough feels too dry, add a teaspoon of water at a time until it comes together.
Rest the Dough: Cover the dough with plastic wrap and let it rest for around 10 minutes. This resting period allows the psyllium husk to absorb moisture, enhancing the dough’s elasticity.
2. Roll Out and Shape the Pasta
Prepare Your Work Surface: Place the dough between two sheets of parchment paper. Using a rolling pin, roll out the dough evenly to about 1/8-inch thickness.
Cut into Noodles: Remove the top parchment paper and use a sharp knife or pizza cutter to slice the dough into wide strips (for fettuccine) or thinner strips for spaghetti-style noodles.
Optional Drying Step: For a firmer texture, allow the pasta sheets to sit out for 5 minutes so they dry slightly before cooking.
3. Cook the Pasta
Boil Water: In a large pot, bring 4-6 cups of water to a boil. Add 1 teaspoon of salt to season the water.
Cook the Pasta: Gently add the pasta strips into the boiling water. Since almond flour pasta cooks quickly, let it simmer for 2-3 minutes. The pasta should be tender but firm to avoid a mushy texture.
Drain and Serve: Carefully drain the pasta using a colander. Rinse briefly with warm water if desired, then toss with your favorite Keto-approved sauce (such as a creamy garlic pesto, marinara, or simply a drizzle of olive oil with grated Parmesan).
Nutrition Facts (Per Serving)
This recipe yields approximately 3 servings.
Nutrient
Amount per Serving (Approx.)
Calories
290 kcal
Total Fat
24 g
Saturated Fat
3 g
Cholesterol
70 mg
Total Carbohydrates
7 g
Dietary Fiber
6 g
Net Carbohydrates
~1 g
Protein
~11 g
Note: These values are estimates based on standard ingredient nutrition data. Variations in product brands or slight adjustments in quantity may result in different nutritional content.
Cooking Tips & Variations
Improve the Almond Flour PastaDough Elasticity: If your dough feels too crumbly, try adding a little extra water (a teaspoon at a time) until the mixture holds together well.
Texture Control: Avoid overcooking your almond flour pasta, as it tends to become mushier than traditional pasta. A brief boil of 2-3 minutes will help maintain a pleasing, tender bite.
Serving Suggestions: Enjoy the pasta with a rich, Keto-friendly marinara, a creamy Alfredo sauce, or simply toss with olive oil, garlic, and fresh herbs.
Vegan Variation: Replace eggs with a flaxseed mixture (1 tablespoon ground flaxseed mixed with 3 tablespoons water, allowed to sit for 5 minutes) for a vegan version, though the texture may vary slightly.
Summary
This Keto Almond Flour Pasta recipe provides a delicious, low-carb alternative to traditional pasta by harnessing the nutty flavor of almond flour. By combining simple ingredients like almond flour, eggs, olive oil, and psyllium husk powder, you create a nutritious dough that cooks quickly and pairs beautifully with a variety of Keto-friendly sauces. The recipe is straightforward, with detailed steps and an approximate nutrition breakdown per serving, making it easy for you to incorporate this inventive dish into your Keto lifestyle.
Enjoy the process and relish in a meal that’s both mindful of your diet and full of satisfying flavor!